 Loading... Please wait...
Store
Newsletter
Hammers and Hardies
| Carbide vs. Steel | |
|
The general rule is carbide for glass, steel for stone. Why is this? As shown in the chart to the right, carbide (technically called tungsten carbide) is 2-3 times harder than steel. As one of the hardest materials, carbide is able to cut smalti, stone, porcelain, etc. So why choose a hammer with a steel tip instead of carbide? Carbide is a crystalline material. A hard, accidental strike of the hammer tip against the tip of the hardie can fracture the carbide and it is not repairable. Steel on the other hand, can be repaired. |
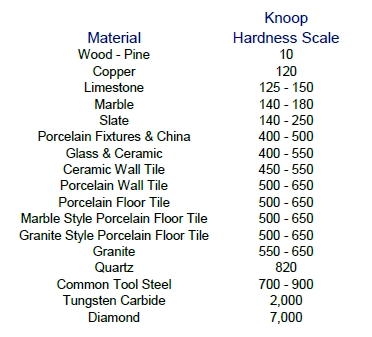 |
On the hardness chart, steel is harder than glass so you might be wondering why a steel hammer is not recommended to cut glass. Steel can cut glass when the edge is first sharpened. But the sharpness of steel will not last. Carbide tools stay sharp much longer and that makes them the best choice for glass.
As a general rule of thumb:
- For cutting smalti and other vitreous (glass like) material, use carbide
- For cutting stone, use steel
☛Our combo hammers come with both carbide and steel tips and are the most common choice for all around use.
| Hammer Weights | |
|
Hammers come in different weights. Which weight to choose is up to the user and is primarily based upon arm strength. One of the benefits of the hammer and hardie technique is the weight of the hammer and gravity can be doing most of the work in cutting. You want the heaviest hammer matched to your strength. |
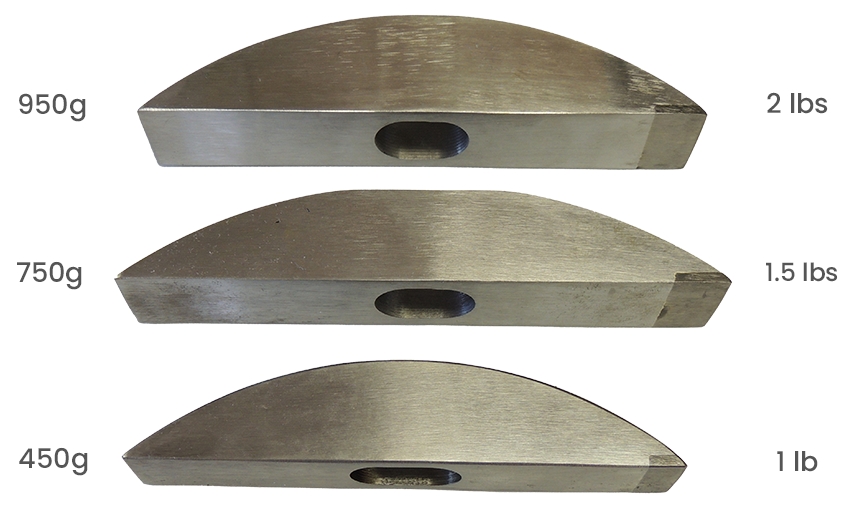 |
How can you tell before buying which hammer weight is best for you? In most hardware stores, you can find a selection of carpentry hammers with different head weights. Try them out to see which feels the best to you.
☛For most folks, the 750g hammer is the best fit.
| Handle Types | |
|
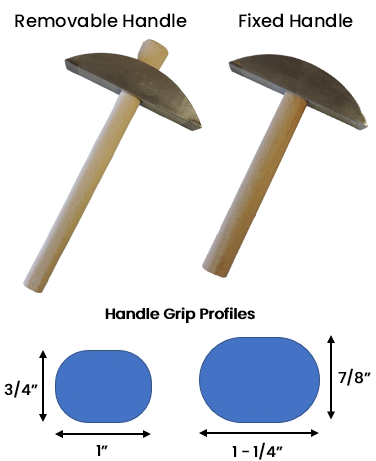
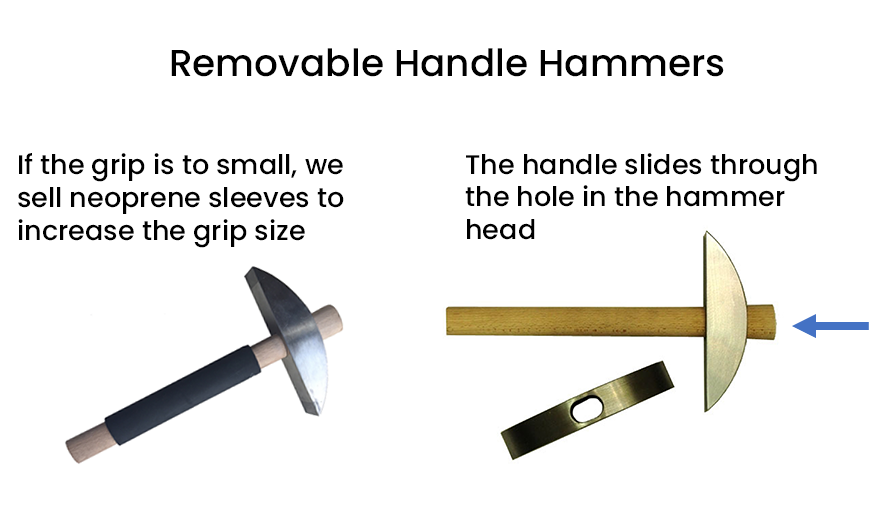
Let's start with fixed vs. removable handles. The fixed option is what most people are familiar with. The handle is permanently mounted to the hammer head. The removable option is the traditional mosaicist's hammer and is used in some mosaic schools in Italy. The benefit of the removable handle is that it is easier to sharpen as the handle is not in the way. One consideration with removable handles is that the grip diameter is smaller than a fixed handle. We do sell neoprene sleeves that can be wrapped around either handle type. Next, how long should the handle be? Why does it matter? You want the hammer to feel like and become an extension of your arm. Check out this YouTube video from the BAMM 2013 conference in which Gary Drostle demonstrates using a hammer and hardie. At about the 2:30 mark, he discusses hammer length. At the 8:30 mark, you'll see how to hold the hammer. Something to notice is if the handle is too long, it will extend behind your hand and into your wrist. What to do if your fixed hammer head comes loose? There are several solutions - the most common is to soak the head (not the whole hammer) in water. This will cause the wood to swell. However it is a temporary solution. A more permanent solution is to use a commercial hammer tightner, such as Swel-Lok, that includes dipropylene glycol. This is what woodworkers and lumberjacks use to tighten hammer and axe handles. We sell Swel-Lok in our store. You can also drive the metal wedge at the top of the handle further in to expand the handle. What about using oil, such as linseed oil, to tighten the handle? Linseed oil will soak into the wood fibers but how much it actually swells the wood is questionable. Check out these tests done on various wood handles using linseed oil. |
|
|
☛An 8" handle extending from the hammer bottom seems to cover most folks. But to be sure, and if you have the tools to do so, we recommend cutting your own handle when you receive your hammer. |
|
| Hardies | |
|
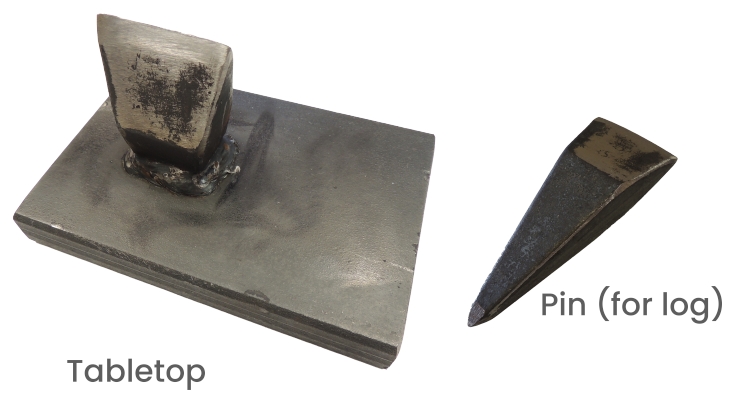
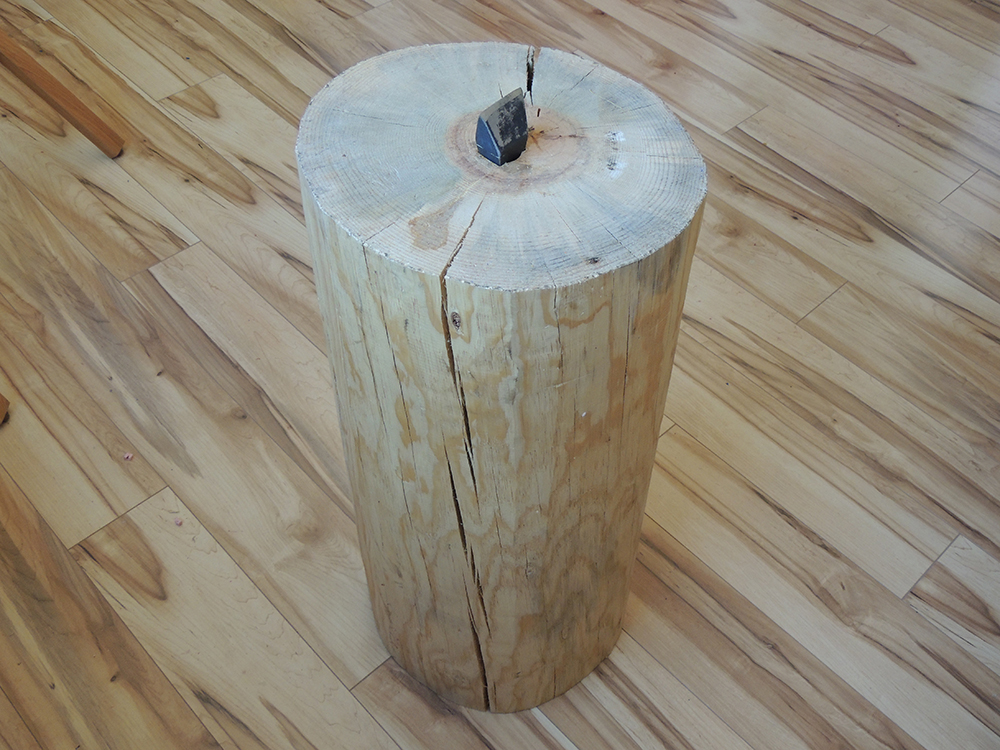
A hardie is used as the base upon which the tesserae is placed during the cutting process. There are two types of hardies - tabletop and pin. The pin hardie is inserted into a block of wood (typically a log). The tabletop hardie is a pin hardie, cutoff and welded to an 8 lb steel plate. Which hardie to choose is dependent upon your workspace. If you purchase a pin hardie, you'll need to obtain a stable block of wood. While logs are very common, you can also use cutdown railway ties or keel blocks for boats (check at a marine supply store). Whatever the material, you'll need to have the tools to drill a 1-1/4" hole 3-4" deeps into the base. The Mosaic Art School in Ravenna has an excellent video tutorial on the installation process. |
|
For more information on correct cutting methods using hammers and hardies, check out the video below. The Mosaic Tools page of our Knowledge Section has information about sharpening and maintaining your hammer and hardie.
Your mosaic hammer will become one of your most valued tools. Rachel Sager has been a hammer aficionado for many years. Her thoughts on hammer choices and applications, as well as examples of her mosaic artwork, can be found here.
Using a Mosaic Hammer

